Search Layouts are a crucial part of any Salesforce system, especially when you have many records. Administrators can manipulate the fields that will appear on the output screens of lookup dialogs. Therefore, many users want to learn more about these layouts and implement them accordingly. We are here with a new blog on Search Layouts in Salesforce that contains information based on the topic.
What are Search Layouts in Salesforce?
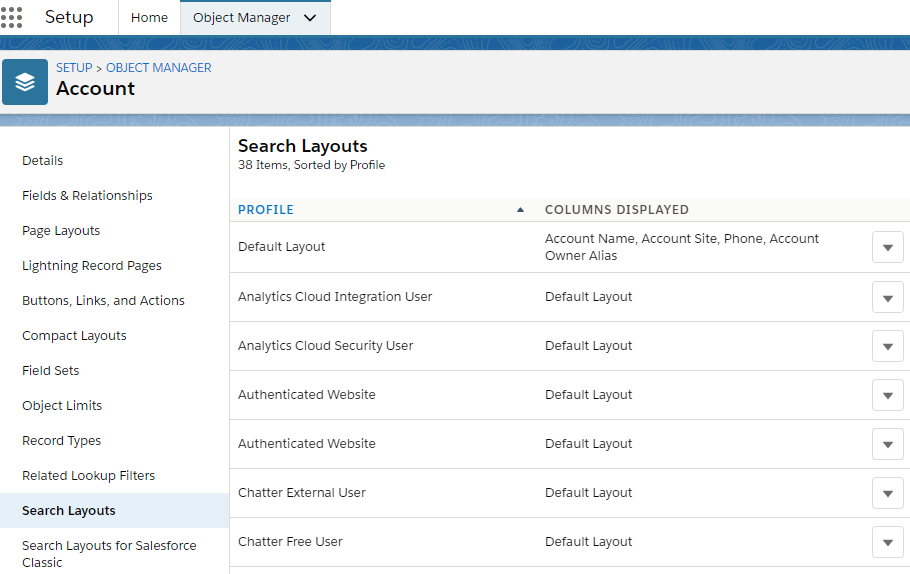
The basic idea of any topic is important from the examination point of view. The use of Search Layouts in Salesforce ecosystem is to customize search results. In other words, these appear on the top whenever a record is accessed through lookup dialogs or related lists. Users can easily choose what details to view in search filter fields, recent records lists, lookup phone dialogs, etc. There is no doubt it will save a lot of time in manually navigating through each record field.
Moreover, you can add or remove the fields according to your requirement using Search Layouts in Salesforce. As per the default settings, related lists and lookup dialogs only display the basic details like record names or numbers. It is the duty of the admin to include multiple fields in the layouts mentioned above. We recommend using Search Layouts in Salesforce Classic rather than on Lightning.
Any standard Search Layout consists of,
Lookup Dialogs
These are the fields that appear on your screen after clicking “Next” on the edit page of a lookup field.
Search Results
You can get the search results of a record by clicking on the Advanced Search button.
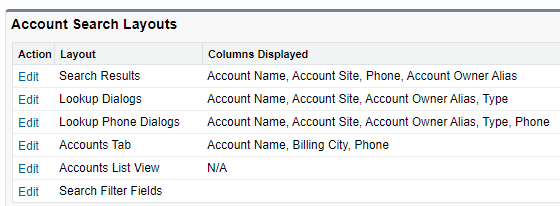
Search Filter Field
As the name suggests, these are specific fields that you can apply to different search results.
Object Tab
It is the complete summary of records that are available on the home page or another object’s detail page.
How Do I Add Search Layouts in Salesforce?

The process of including search layouts in any record is quite easy. Just follow the given steps,
- Navigate to Setup -> Build -> Customize -> Account
- Select the “Search Layout” option from the list
- Choose the correct layout that you wish to edit.
- Next, click on the desired fields from the “Available Fields” table. You can add them into “Selected Fields” by clicking on the arrow button.
- Moreover, you can change the order of fields to display them in the final output.
- Save the changes and you are ready to go.
Conclusion
In the end, we now conclude our journey of understating Seach Layouts in Salesforce. It helps you customize fields that you want to display in the lookup dialogs and other places. Make sure to test them out on your system and try to gain good practice. Further, you can post your queries to us for better assistance.
If you want to learn more about it, enroll for our special
Salesforce Platform App Builder Certification course just for you!
We have a special discount exclusive for our readers.