
Are you wondering about the differences between the Data Import Wizard and the Data Loader in Salesforce? 🤔 Look no further! In this post, we’ll explore data import wizard vs data loader. Data Import Wizard vs Data Loader, a comparison of two powerful tools for seamless data management in Salesforce.
Data Import Wizard
The Data Import Wizard is a user-friendly tool designed for smaller data imports. Here’s what sets it apart:
- ✅ Records: You can load up to 50,000 records at a time using the Data Import Wizard.
- ✅ Objects: It supports both custom objects and specific standard objects such as accounts, contacts, leads, Campaign members and solutions.
- Importing cases and opportunities is not possible with Data Import Wizard, but it can be done using Data Loader.
- ✅ Operations: You can perform insert and update operations with ease.
- ❌ Delete Operation: Unfortunately, the Data Import Wizard does not support the delete operation, so you cannot delete records using this tool.
- ✅ Installation: The Data Import Wizard is available directly on the Salesforce platform, so there’s no need for any additional installations.
Data Loader
- The Data Loader, on the other hand, is a robust tool suitable for handling larger data imports. Let’s explore its distinctive characteristics:
- ✅ Records: With the Data Loader, you can handle much larger volumes of data, up to millions of records, making it ideal for extensive data imports.
- ✅ Objects: It supports both custom objects and ALL standard objects in Salesforce, providing more flexibility in importing data.
- ✅ Operations: The Data Loader offers a wide range of operations, including insert, update, upsert (insert or update), and delete, giving you more control over your data management tasks.
- ✅ Installation: Unlike the Data Import Wizard, the Data Loader requires installation on your machine. You can download and set it up easily to leverage its advanced capabilities.
How to install Data Loader ?
To install the Data Loader, follow these step-by-step instructions:

- Login to your salesforce org.
- Click the Gear icon on the top right. Go to Setup.
- In the left-hand sidebar of the Setup page, type Data Loader and click the Data Loader Link under Integrations as shown below.
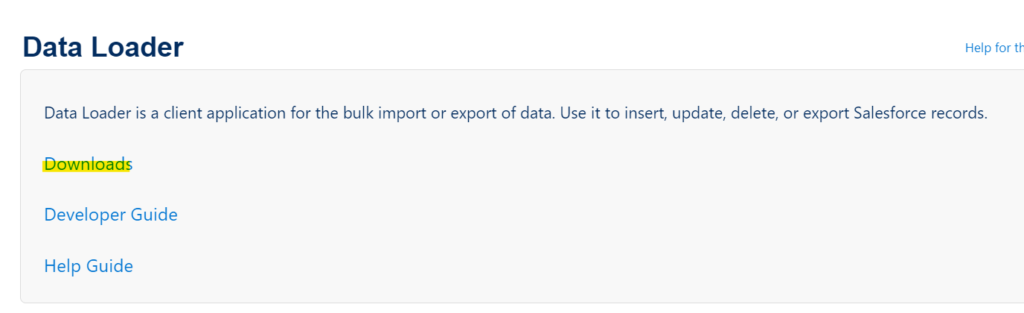
- On the Data Loader page, you’ll find options to download the Data Loader for Windows or Mac. Select the version compatible with your operating system.
- Download the installer: Click on the “Download the Data Loader” link to begin downloading the installer file. Choose a location on your computer where you want to save the file.
- Run the installer: Once the download is complete, locate the downloaded installer file and double-click on it to run the installation process.
- Follow the installation wizard: The installation wizard will guide you through the installation process. Review and accept the terms and conditions, choose the installation location, and click on “Install” to begin the installation.
- Complete the installation: Wait for the installation to finish. Once it’s done, you’ll see a confirmation message indicating that the Data Loader has been successfully installed.
- Launch the Data Loader: After installation, you can launch the Data Loader by locating the program in your computer’s applications or programs menu. Alternatively, you can double-click on the Data Loader desktop icon if one was created during installation.


How to access Data Import Wizard in Salesforce?
You can access the Data Import Wizard through the Setup menu:
- Log in to your Salesforce account.
- Click on the gear icon on the top right side and click Setup.
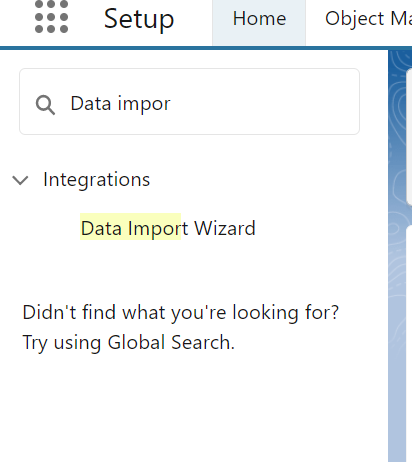
- In the left sidebar of the Setup page, search for “Data Import Wizard” and you will be able to access it under Integrations.
- Click on “Data Import Wizard” to open it.
Once you access the Data Import Wizard, you can follow the instructions provided to load data into Salesforce using the wizard’s user-friendly interface.

Get you Platform App Builder Certification